Breathing New Life: My DIY Home Server Project! 💻➡️🏠
Turning e-waste into a useful home lab with a bit of tinkering.
The Spark ✨: Old Laptops Get a Second Chance
Recently, a friend gifted me some old laptops. Instead of letting them gather dust or become e-waste, I saw an opportunity! 💡 Why not build a home server? It's a great way to learn, host services, and make use of hardware that might otherwise be discarded.


The challenge? These laptops came barebones – no SSD, no RAM, and crucially, no power adapter! But where there's a will (and some spare parts), there's a way.
The Hardware Hustle 🛠️: Powering Up!
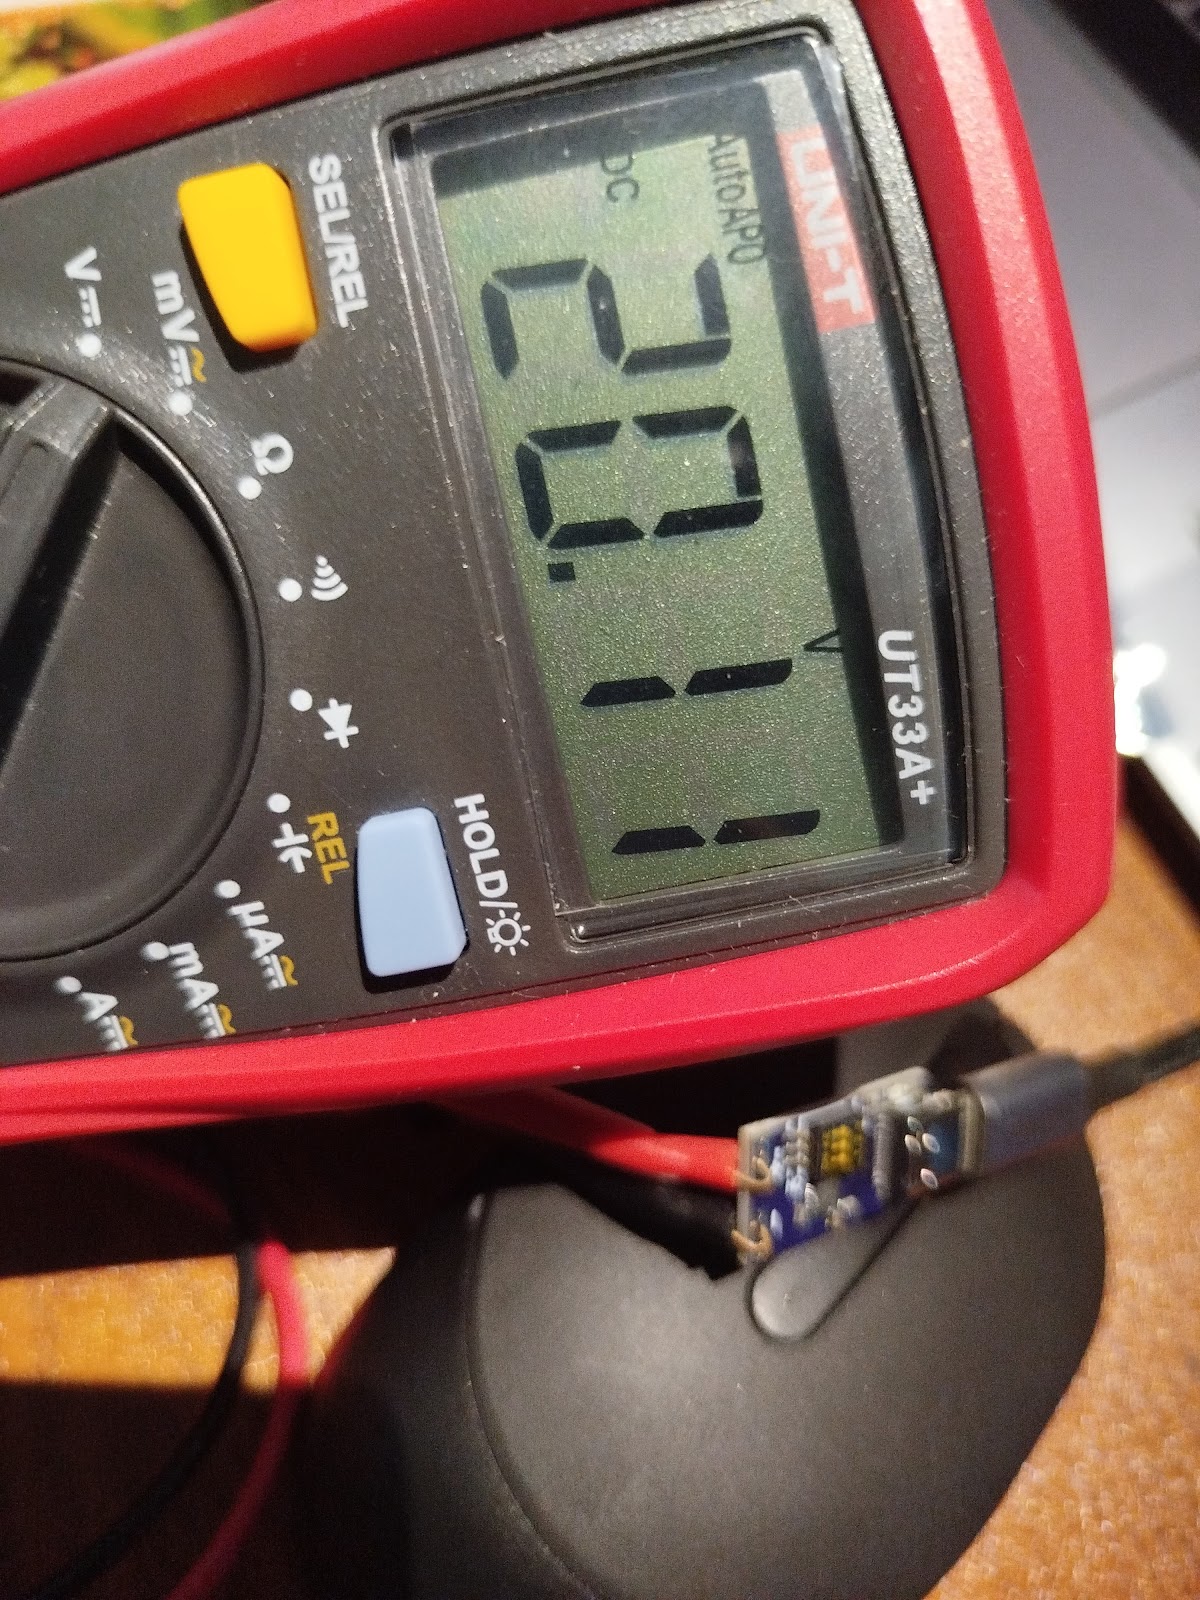
The biggest hurdle was power. Luckily, I had a nifty USB-C PD Fast Charger Decoy Board (100W capable!) lying around. These little boards can negotiate specific voltages from USB-C Power Delivery chargers.

The laptop needed 19V via its barrel jack. I configured the decoy board's DIP switches to request 20V from my USB-C charger (close enough!). Then came the slightly nerve-wracking part: soldering! 👨🏭
- Identified the positive (+) and ground (-) pins on the laptop's power input.
- Soldered the decoy board's output wires directly to these points.
- Carefully cut a small slot in the laptop's casing to neatly house the board.
- Used strong double-sided tape to secure the board inside.


Plugged in the USB-C charger, held my breath... and success! 🎉 The laptop powered on, drawing juice through the new setup. Phew!
Next, I installed some spare DDR3 RAM and an old SATA SSD I had available. Hardware complete! ✅
The Software Stack 🐧🐳: Ubuntu & Docker
With the hardware sorted, it was time for the operating system. I opted for Ubuntu Server – it's stable, widely supported, and great for server tasks. Installation was straightforward via a USB drive.

To manage the various services I wanted to run, I decided to use Docker. Containers make it super easy to install, run, and manage applications in isolated environments. No more dependency nightmares! 🐳
Installing Docker on Ubuntu:
# Update package list
sudo apt update

# Install prerequisites
sudo apt install -y apt-transport-https ca-certificates curl software-properties-common

# Add Docker's official GPG key
curl -fsSL https://download.docker.com/linux/ubuntu/gpg | sudo gpg --dearmor -o /usr/share/keyrings/docker-archive-keyring.gpg

# Add Docker repository
echo "deb [arch=$(dpkg --print-architecture) signed-by=/usr/share/keyrings/docker-archive-keyring.gpg] https://download.docker.com/linux/ubuntu $(lsb_release -cs) stable" | sudo tee /etc/apt/sources.list.d/docker.list > /dev/null

# Install Docker Engine
sudo apt update
sudo apt install -y docker-ce docker-ce-cli containerd.io

# Add your user to the docker group (to run docker without sudo - log out/in after)
sudo usermod -aG docker ${USER}

# Verify installation
docker --version
Note: You'll need to log out and log back in for the group change (`usermod`) to take effect.
My Container Crew 🚀: Services Running
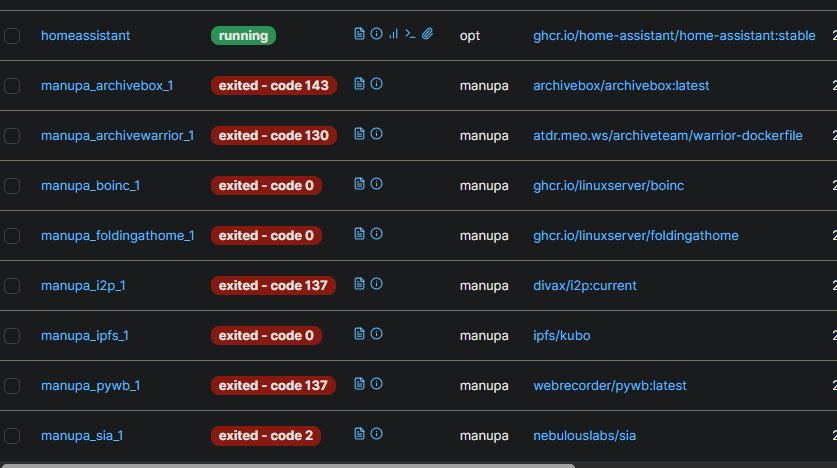
Here are the initial containers I set up:
🗄️ ArchiveBox (Good Karma Kit)

This awesome tool creates local, browsable archives of websites. Perfect for saving articles, documentation, or anything important online before it disappears. The Good Karma Kit aspect seems focused on archiving public interest content.
Docker Run Command:
docker run -d \
  --name archivebox \
  -p 8000:8000 \
  -v ~/archivebox_data:/data \
  archivebox/archivebox
Access it at `http://[your-server-ip]:8000`. Replace `~/archivebox_data` with your desired host path for data storage.
🚢 Portainer

Managing Docker containers via the command line is fine, but Portainer provides a fantastic web UI. It makes it easy to view logs, manage containers, networks, volumes, and more. Highly recommended for managing your Docker environment!
Docker Run Command (Portainer CE):
# First, create a volume for Portainer data
docker volume create portainer_data

# Then, run the Portainer container
docker run -d \
  -p 8000:8000 \
  -p 9443:9443 \
  --name portainer \
  --restart=always \
  -v /var/run/docker.sock:/var/run/docker.sock \
  -v portainer_data:/data \
  portainer/portainer-ce:latest
Access it at `https://[your-server-ip]:9443` (HTTPS) or `http://[your-server-ip]:8000`. You'll set up an admin user on first access.
🎬 Plex Media Server

No home server is complete without a media solution! Plex organizes your movies, TV shows, music, and photos, allowing you to stream them to virtually any device, anywhere. It scans your media folders and automatically fetches metadata and artwork.
Docker Run Command (Requires Plex Claim Token):
# Get a claim token from https://www.plex.tv/claim/
# Replace YOUR_CLAIM_TOKEN, /path/to/plex/config, /path/to/tvshows, /path/to/movies

docker run -d \
  --name plex \
  --network=host \
  -e PLEX_UID=$(id -u) \
  -e PLEX_GID=$(id -g) \
  -e PLEX_CLAIM="YOUR_CLAIM_TOKEN" \
  -e TZ="Your/Timezone" `# e.g., Asia/Colombo` \
  -v /path/to/plex/config:/config \
  -v /path/to/transcode/temp:/transcode \
  -v /path/to/media/tvshows:/data/tvshows \
  -v /path/to/media/movies:/data/movies \
  --restart unless-stopped \
  plexinc/pms-docker:latest
Access the setup wizard at `http://[your-server-ip]:32400/web`. Make sure the paths you map (`/path/to/...`) exist on your host system and have correct permissions.
🏠 Home Assistant

Home Assistant! It's an incredibly powerful open-source home automation platform. You can integrate smart devices, create automations, track sensors, and build amazing dashboards.
Docker Run Command:
docker run -d \
  --name homeassistant \
  --privileged \
  --restart=unless-stopped \
  -e TZ=Your/Timezone `# e.g., Asia/Colombo` \
  -v /path/to/homeassistant/config:/config \
  --network=host \
  ghcr.io/home-assistant/home-assistant:stable
Access it at `http://[your-server-ip]:8123`. Replace `/path/to/homeassistant/config` with your desired config path. `--network=host` is often needed for device discovery.
📊 btop++ (Resource Monitor)
While not typically run as a Docker container, `btop++` is an excellent TUI (Text User Interface) resource monitor. It gives a detailed, real-time view of CPU, memory, disk, and network usage right in your terminal. Very handy for seeing how the server is performing!
Installation Command (Ubuntu):
sudo apt update
sudo apt install -y btop
Usage:
btopSmart Scheduling ⏰: Working Around Data Caps
My ISP offers unlimited data during off-peak hours (midnight to 7 AM). To take advantage of this for potentially data-intensive tasks (like ArchiveBox fetching sites), I set up a cron job. Cron is a time-based job scheduler in Unix-like operating systems.
I scheduled tasks to automatically stop certain containers at 7 AM and start them again at midnight. This helps manage bandwidth usage and costs effectively. 💰
Example Cron Job (Edit with `crontab -e`):
# Stop ArchiveBox container at 7:00 AM daily
0 7 * * * docker stop archivebox

# Start ArchiveBox container at 00:00 AM (midnight) daily
0 0 * * * docker start archivebox
You'd add similar lines for any other containers you want to schedule.
What's Next? 🤔 More Containers!
This is just the beginning! I'm excited to explore more self-hosted applications. What other containers do you recommend for a home server setup?
Some popular ideas include:
- Nextcloud ☁️: Your own private cloud for files, calendars, contacts, and more (like Google Drive/Dropbox).
- Pi-hole 🚫: Network-wide ad blocker. Say goodbye to most ads on all your devices!
- Vaultwarden (Bitwarden server) 🔑: Self-hosted password manager.
- Jellyfin 🎞️: Another excellent open-source media server alternative to Plex.
- AdGuard Home 🛡️: Similar to Pi-hole, provides network-wide ad and tracker blocking.
- Uptime Kuma 📈: A fancy monitoring tool to check if your services (and other websites) are online.
Let me know your favorite self-hosted apps!


This is really useful !
ReplyDelete